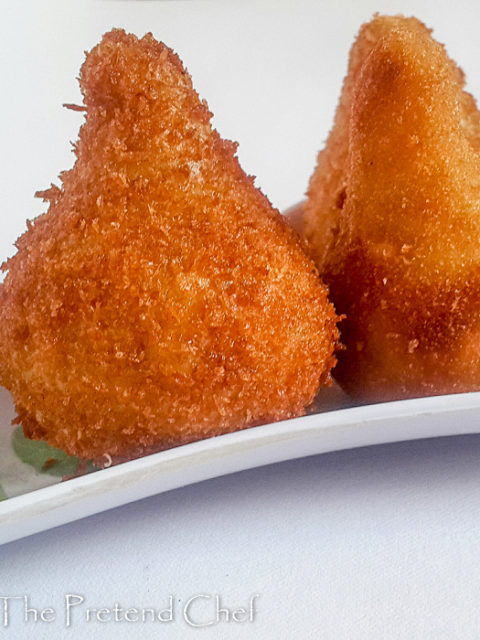
Coxinha, Brazilian Chicken Fritters
Coxinha is a Brazilian chicken fritter, a popular street snack and also an appetiser at parties. Shaped like a chicken drumstick, coxinha means little chicken thigh. There are 3 layers to the coxinha, an outer crispy exterior, a middle layer of soft dough and a moist seasoned chicken filling.
Ingredients
Filling
- 1 ¼ - 1 ½ cups finely minced or shredded cooked chicken (320g chicken on bone)
- 1 tablespoon vegetable oil
- ¼ cup minced onions
- 1 garlic clove
- ⅛ teaspoon turmeric
- ½ tablespoon finely chopped parsley
- 1 ½ tablespoon finely chopped spring onions
- ¼ teaspoon black pepper
- ¼ teaspoon dry chili
- salt
- 1 ½ tablespoons mayonnaise
Dough
- 1 cup chicken stock* (1 chicken seasoning cube or powder)
- 1 teaspoon vegetable oil
- ½ teaspoon salt
- ⅛ teaspoon tumeric
- 1 cup + 1 tablespoon flour
Dredging
- 1 egg white (beaten)
- 1 cup bread crumbs
Instructions
Meat
- Place chicken breasts in a pot over medium-high heat, cover with water, season with salt and seasoning cube or 1 teaspoon seasoning powder.
- Cook until the chicken is fully cooked.
- Strain the chicken stock and put 1 cup back into the pot. Set aside.
Filling
- Put vegetable oil in a frying pan over medium heat, when the oil is hot add onion, fry until translucent, add garlic and stir until fragrant, take off the heat and set aside.
- If you are using a food processor, remove skin and bones from chicken, dump it into the food processor, add all the other filling ingredients and mince. Set aside.
- Or Remove the skin and bones of the chicken and chop the chicken meat very finely.
- Add the onions and garlic, turmeric, chopped parsley, chopped spring onions, black pepper, chilli pepper, salt and mayonnaise into the minced chicken.
- Stir very well to combine.
Dough
- Into the 1 cup of chicken broth in the pot, add vegetable oil, salt and turmeric, stir and bring to a boil. (*In case there is no chicken stock, use plain water with chicken seasoning).
- Once the mixture comes to a boil, remove from heat and dump the whole flour into it, stir vigorously with a wooden spoon.
- Put the pot back on the heat and keep stirring and turning until dough is uniform but not very smooth, about 3 minutes.
- Transfer dough to a lightly floured surface. Knead for a few minutes, until very soft and smooth. Or put the dough into an electric mixer at low speed. Using the dough hook mix until soft and smooth.
- Take it out, knead a little, shape it into a ball and wrap it with plastic wrap. Leave to rest for about 5-8 minutes.
Moulding
- Meanwhile, place your breadcrumbs into a bowl, put egg white into another bowl and cover a tray with parchment paper. Set aside.
- Grease your hands with a little oil, pinch out some dough about the size of an egg (depending on the size you want).
- Spread it open on the palm of your hand making it thin about 1/4-1/8 inch thick.
- Place 1 tablespoon of chicken filling in the centre.
- Press filling lightly down and gently pinch and close. Roll between your palms until it is smooth. It doesn't have to be perfectly smooth because the bread crumbs will cover any imperfections.
- There should be no crack, if there is, use a little dough and cover it, then roll in your oiled hand to smoothen. Place on your tray.
- When you are through forming the coxinhas, dip each into the beaten egg then into the breadcrumb, making sure it is well coated and well covered in bread crumbs, set aside on the tray.
- Deep fry them in batches without overcrowding the oil until golden brown.
- Drain onto a plate lined with paper towels.
- Serve with ketchup or hot sauce on the side.
Notes
- Coxinha filling should not be moist because moisture upon heating turns into vapour which will cause the coxinha to break open in the oil. It has to be dry.
- Be patient when moulding your coxinha, if you start tiring, you can roll them into balls and get it done with.
- The filling should not touch the edges of the dough disc.
- Make sure the dough seals well. If there is a crack, rub to seal it or else it will crack open in the oil when frying.
- There should not be too much filling in each coxinha or else it will crack open in the oil.
- The oil should not be too cold. To test if the temperature of the oil is right, throw a small ball of dough into the hot oil it should start sizzling immediately and rise to the top.
- It doesn't take long to fry, remember everything is already cooked.
- Normally, when you slice coxinha open there is a layer of soft dough inside, it is part of the layers of texture that make up the fritter.
- Potato and milk are sometimes added to the dough.
- Freeze moulded raw coxinha for up to 3 months. When you want to eat, roll each in egg white and bread crumbs and fry from frozen.
- Store already fried and cooled coxinha in the freezer, in a freezer bag. When ready to eat, place on a baking tray frozen and place in an oven at 180 deg. C for 8-10 minutes.